
The Honeywell TH6320U2008 is a high-efficiency smart thermostat designed for seamless HVAC control, offering programmable scheduling, smart home integration, and energy-saving features for optimized comfort and convenience.
1.1 Overview of the Honeywell TH6320U2008 Model
The Honeywell TH6320U2008 is a programmable smart thermostat designed for compatibility with various HVAC systems, offering advanced features like voice control and a high-resolution color touchscreen. It supports smart home integration with platforms like Amazon Alexa and Google Home, enhancing convenience. The thermostat is energy-efficient, with features such as geofencing and smart scheduling to optimize heating and cooling usage. Its Universal Wall Plate (UWP) mounting system ensures easy installation and compatibility with existing wiring setups. This model is ideal for homeowners seeking a user-friendly, modern solution to manage their home climate efficiently while reducing energy consumption.
1.2 Importance of Proper Installation
Proper installation of the Honeywell TH6320U2008 thermostat is crucial for ensuring optimal performance, reliability, and energy efficiency. Incorrect installation can lead to malfunctioning, reduced system efficiency, and potential safety hazards. The Universal Wall Plate (UWP) must be mounted correctly to ensure a secure and level surface for the thermostat. Improper wiring or overtightening of screws can damage the device or cause inaccurate temperature readings. Following the installation manual carefully ensures that all features, including smart home integration and scheduling, function as intended. Proper installation also prevents issues like power failures or inconsistent heating and cooling, guaranteeing a seamless user experience and long-term durability of the thermostat.
1.3 Key Features of the Thermostat
The Honeywell TH6320U2008 thermostat boasts advanced features such as programmable scheduling, smart home integration, and energy-saving modes. It supports geofencing for location-based temperature control and offers remote access through the Honeywell Home app. The thermostat is compatible with various HVAC systems and includes a touchscreen display for easy navigation. It also features advanced setup options, including installer parameters and energy usage reports. The device operates on AA batteries, ensuring continuous functionality during power outages. With its sleek design and user-friendly interface, the TH6320U2008 provides seamless control over heating and cooling systems, optimizing comfort and energy efficiency for homeowners.
Pre-Installation Requirements
Ensure HVAC system compatibility, gather necessary tools like drills and screwdrivers, and follow safety precautions. Verify all components are included and understood before starting the installation process.
2.1 Compatibility Check for HVAC Systems
Before installing the Honeywell TH6320U2008, ensure compatibility with your HVAC system. This thermostat is designed to work with most heating, ventilation, and air conditioning systems, including gas, oil, electric, and heat pumps. It supports up to 3 heat stages and 2 cool stages. Verify that your system operates on 24V AC and does not require a line voltage connection. Check the wiring configuration to confirm it matches the terminal requirements of the thermostat. If unsure, consult your HVAC system’s manual or contact a professional installer. Proper compatibility ensures optimal performance and avoids potential installation issues.
For dual-fuel systems or specialized setups, additional verification may be necessary. Always refer to Honeywell’s compatibility guide or contact their support team for specific system requirements.
2.2 Tools and Materials Needed
To install the Honeywell TH6320U2008 thermostat, you will need several tools and materials. These include a screwdriver (both Phillips and flathead), wire strippers, a voltage tester, and a drill with bits for wall anchors. Additionally, ensure you have the Universal Wall Plate (UWP) and mounting screws provided with the thermostat. Wall anchors and extra drywall screws may be required for secure installation. AA batteries are also necessary for powering the thermostat. For safety, keep a ladder or step stool handy if installing at a height. Having these tools and materials ready will streamline the installation process and ensure a proper setup. Always refer to the installation guide for specific requirements.
2.3 Safety Precautions Before Starting
Before installing the Honeywell TH6320U2008, ensure the HVAC system’s power is turned off at the circuit breaker to avoid electrical hazards. Verify the system compatibility with the thermostat to prevent malfunction. Avoid overtightening screws, as this can damage the wall or device. Use the supplied tools and materials to ensure proper installation. Do not use damaged or inappropriate tools, as this may lead to unsafe conditions. Always follow local electrical codes and regulations. If unsure about any step, consult a licensed professional for assistance. These precautions ensure a safe and successful installation process.
2.4 Understanding the Thermostat Components
The Honeywell TH6320U2008 thermostat consists of key components essential for its operation. The Universal Wall Plate (UWP) serves as the base, ensuring secure mounting and wiring connections. The cover plate houses the touchscreen display and controls, providing user interaction. The wiring terminals connect to your HVAC system, enabling precise temperature control. AA batteries supply power, while the thermostat’s internal circuitry manages energy-efficient performance. Additional components include sensors for temperature and humidity, as well as Wi-Fi capabilities for smart home integration. Familiarizing yourself with these parts ensures proper installation and functionality. Understanding each component’s role is crucial for troubleshooting and maintaining optimal system performance.
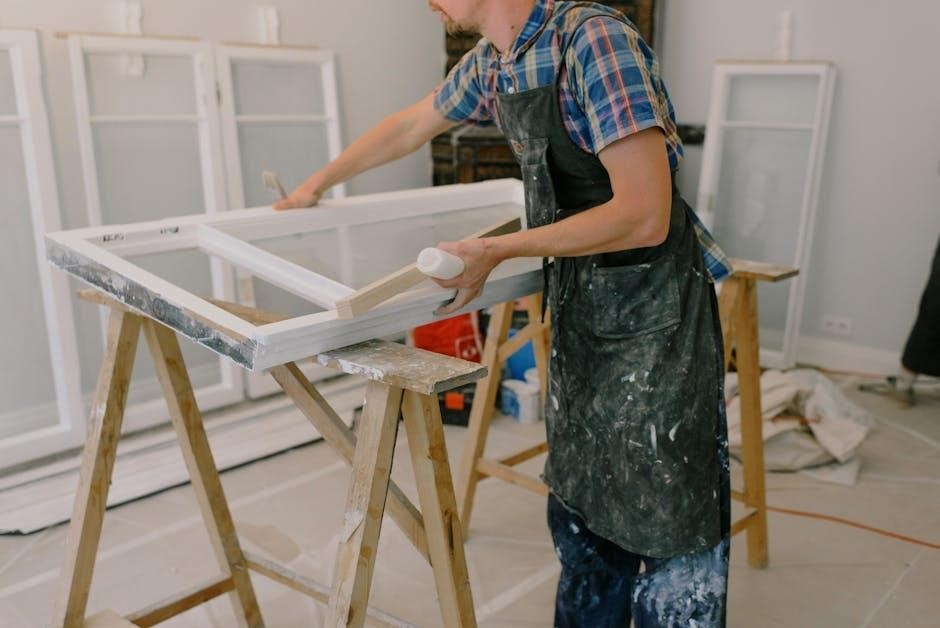
Installation Process
Mount the Universal Wall Plate, insert AA batteries, and connect wires according to the terminal tabs. Secure the thermostat to the wall plate and tighten screws gently.
3.1 Mounting the Universal Wall Plate (UWP)
To mount the Universal Wall Plate (UWP), align it with the wall anchors provided in the installation kit. Gently place the UWP over the anchors and insert the supplied mounting screws. Tighten the screws until the UWP is secure and no longer moves, but avoid overtightening to prevent damage. Ensure the plate is level and evenly positioned on the wall. Once mounted, the UWP provides a stable base for the thermostat, ensuring proper installation and functionality. This step is crucial for a reliable and efficient setup of the Honeywell TH6320U2008 thermostat.
3.2 Installing the Cover Plate
To install the cover plate, align it with the Universal Wall Plate (UWP) and ensure it is level. Use the provided screws to secure the cover plate, inserting them into the designated screw holes. Tighten the screws firmly but avoid overtightening, as this could damage the plate. Once installed, check that the cover plate is flush with the wall and properly aligned. This step ensures a clean and professional appearance, while also protecting the internal components of the thermostat. Make sure the cover plate is securely fastened to prevent any movement or gaps. Proper installation of the cover plate is essential for both functionality and aesthetics.
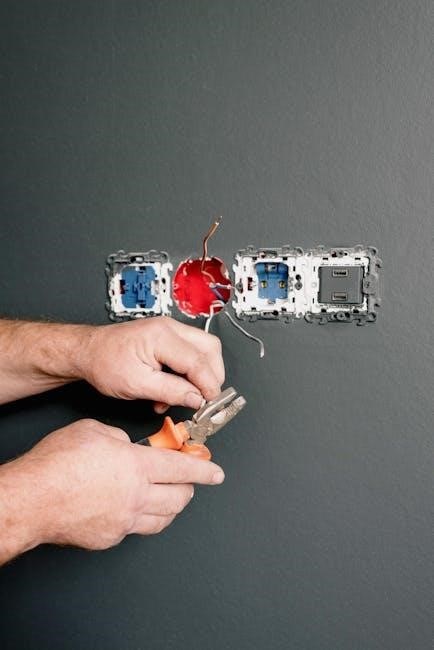
3.3 Wiring the Thermostat
Proper wiring is essential for the Honeywell TH6320U2008 thermostat to function correctly. Begin by turning off the power to your HVAC system at the circuit breaker. Remove any wires from the old thermostat and label them for identification. Mount the Universal Wall Plate (UWP) and connect the wires to the corresponding terminals, ensuring they are securely attached. Match the wire colors to their respective functions (e.g., R, W, Y, G, C). Avoid forcing wires into terminals, as this may damage the connections. Once all wires are connected, attach the thermostat to the UWP and tighten the screws gently. Finally, insert the AA batteries and restore power to test the system.
3.4 Inserting AA Batteries for Power
To ensure continuous operation, insert two AA batteries into the Honeywell TH6320U2008 thermostat. Locate the battery compartment, typically found on the front or side of the device. Open the compartment by gently sliding it or pressing a release button, depending on the model. Align the batteries with the correct polarity, as indicated by the ‘+’ and ‘-‘ symbols inside the compartment. Place the batteries securely to avoid any loose connections. Close the compartment firmly until it clicks to ensure it is properly sealed. This step provides both primary and backup power, preventing any interruption in thermostat functionality. Always use high-quality AA batteries to maintain reliability and performance. If unsure, consult the user manual for specific instructions or diagrams to guide the process accurately.
3.5 Final Mounting and Tightening
After installing the wiring and cover plate, ensure the thermostat is properly aligned with the wall anchors. Gently press the device onto the Universal Wall Plate (UWP) until it clicks securely into place. Tighten the mounting screws provided with the thermostat, but avoid overtightening, as this could damage the unit or the wall. Double-check that the thermostat is level and plumb to ensure proper functionality. Once mounted, verify that all connections are secure and the display is responsive. Finally, turn the power back on at the circuit breaker and test the thermostat to confirm it operates correctly. Proper mounting ensures reliable performance and longevity of the device.
Setup and Configuration
The Honeywell TH6320U2008 setup involves navigating through initial parameters, advanced options, and scheduling. Users can customize energy-saving modes, enable smart features, and ensure optimal HVAC performance.
4.1 Initial Setup Parameters (ISU)
The Initial Setup Parameters (ISU) are the first steps in configuring your Honeywell TH6320U2008 thermostat. These settings include basic options like date, time, and temperature scale (°F/°C). You’ll also select your HVAC system type, such as heat pump or gas furnace, to ensure proper operation. Additionally, parameters like fan operation and temperature range are set during this phase. Use the touchscreen interface to navigate through the menu and confirm each setting. Properly configuring these parameters ensures your thermostat operates efficiently and aligns with your home’s HVAC system. Once completed, you can proceed to advanced setup options for customized control.
4.2 Advanced Setup Options
The Honeywell TH6320U2008 offers advanced setup options for tailored comfort and efficiency. Users can enable geofencing to adjust temperatures based on location, set custom temperature ranges, and configure fan operation modes. Energy-saving features like smart recovery and adaptive learning optimize heating and cooling cycles. Additionally, the thermostat allows for humidity control integration and advanced scheduling with multiple daily setbacks. Installer parameters can fine-tune system performance, such as adjusting cycle rates or enabling auxiliary heat. These features ensure a personalized and energy-efficient experience, making the thermostat adaptable to various lifestyles and HVAC systems.
4.3 Scheduling and Programming
The Honeywell TH6320U2008 allows users to create custom temperature schedules, optimizing comfort and energy efficiency. Program daily or weekly schedules with ease, adjusting temperature settings to match your lifestyle. The thermostat’s intuitive interface enables seamless programming, with options to set specific times for heating and cooling. Energy-saving features automatically adjust temperatures during peak hours or when the home is unoccupied. Schedules can be managed via the thermostat itself or through the Honeywell Home app, ensuring remote control and flexibility. Advanced programming options also allow for vacation mode and recurring settings, making it ideal for homeowners seeking precise climate control and reduced energy consumption.
4.4 Smart Features and Remote Access
The Honeywell TH6320U2008 offers advanced smart features, including remote access through the Honeywell Home app, enabling users to control their HVAC system from anywhere.
With geofencing technology, the thermostat can detect your location and adjust settings automatically for energy efficiency.
Voice control compatibility with Amazon Alexa and Google Assistant adds convenience, allowing hands-free temperature adjustments.
The thermostat also integrates seamlessly with smart home systems, enhancing overall home automation.
Remote access ensures you can monitor and adjust settings even when you’re not at home, providing peace of mind and optimal comfort.
These features make the TH6320U2008 a modern, user-friendly solution for smart home enthusiasts.
4.5 Energy-Saving Settings
The Honeywell TH6320U2008 offers advanced energy-saving features to optimize your HVAC system’s efficiency. Use geofencing to automatically adjust temperatures when you leave or arrive home. Enable smart scheduling to create customized temperature profiles for different times of the day. The thermostat also includes an energy-saving mode that learns your usage patterns to minimize energy waste. Additionally, it provides detailed energy reports to help you track your consumption and identify areas for improvement. For further efficiency, you can set temperature limits and enable adaptive recovery, which adjusts the temperature gradually to reach your desired setting at a specific time. These features ensure your system operates efficiently while maintaining comfort.
Advanced Features and Customization
The Honeywell TH6320U2008 offers advanced features like geofencing, smart home integration, and customizable display settings, allowing users to tailor their HVAC experience for enhanced comfort and efficiency.
5.1 Installer Setup (ISU) Parameters
The Installer Setup (ISU) parameters are advanced configuration options designed to tailor the Honeywell TH6320U2008 thermostat to specific HVAC system requirements. These settings allow installers to customize operational aspects such as temperature ranges, system operation modes, and safety limits. The ISU parameters are accessed during the initial setup process and are typically configured by professionals to ensure optimal performance. Detailed in the installation manual, these parameters provide precise control over the thermostat’s functionality, enabling compatibility with a wide range of heating and cooling systems. Proper configuration of ISU parameters is crucial for achieving efficient and reliable operation, making it a critical step in the installation process.
5.2 Geofencing and Location-Based Control

Geofencing and location-based control allow the Honeywell TH6320U2008 thermostat to automatically adjust settings based on your location. This feature uses your smartphone’s GPS to detect when you leave or approach your home, optimizing heating and cooling for energy efficiency. Enable this feature through the Honeywell Home app, linking your thermostat to your device’s location services. Set a geofence radius around your home, and the thermostat will switch to an energy-saving mode when you’re away. This smart feature ensures comfort upon arrival and reduces energy waste when no one is home. Customize settings to balance convenience and energy savings based on your lifestyle.
5.3 Smart Home Integration
The Honeywell TH6320U2008 seamlessly integrates with popular smart home systems, including Amazon Alexa and Google Assistant, allowing voice control and enhanced automation. Users can connect the thermostat to their smart home hub for synchronized operation with other devices. The Honeywell Home app enables remote temperature adjustments, scheduling, and geofencing capabilities, ensuring energy efficiency. Compatibility with platforms like Samsung SmartThings further expands its smart home functionality. This integration allows homeowners to create a unified, intelligent system for optimal comfort and energy savings. The thermostat’s Wi-Fi connectivity ensures smooth communication with smart devices, making it a versatile addition to any connected home ecosystem.
5.4 Customizing the Display Settings
The Honeywell TH6320U2008 allows users to personalize their display settings for a tailored experience. Adjust brightness levels to suit lighting conditions, ensuring the screen remains visible without unnecessary glare. The thermostat also features a screen timeout option, which turns off the display after a set period of inactivity to conserve energy. Additionally, users can customize the display theme, choosing between light and dark modes to match their home decor or personal preference. These settings enhance both functionality and aesthetics, ensuring the thermostat seamlessly integrates into any environment while maintaining optimal performance and energy efficiency.
Troubleshooting Common Issues
Common issues include incorrect wiring, battery drain, or software glitches. Verify connections, replace batteries, and restart the thermostat to resolve most problems quickly.
- Check for loose wires or incorrect terminals.
- Ensure batteries are installed correctly and not expired.
- Restart the thermostat after updating firmware.
6.1 Common Installation Mistakes
One of the most common installation mistakes is overtightening the mounting screws, which can damage the wall or the Universal Wall Plate (UWP). Another error is improper wiring, such as mismatching terminals or not removing wires correctly by depressing the terminal tabs. Additionally, some users forget to insert AA batteries, leading to power issues. Misaligning the UWP over wall anchors or failing to level the thermostat can also cause installation problems. Incorrectly securing the cover plate or not following the step-by-step guide may result in malfunction. Always double-check the manual and ensure all components are properly aligned and tightened to avoid these issues.
6.2 Resolving Wiring Issues
Wiring issues are common during thermostat installation. Always refer to the wiring diagram in the manual to ensure correct terminal assignments. Verify that all wires are securely connected to the appropriate terminals on the UWP. If the thermostat fails to power on, check for loose connections or incorrect wiring. Use the UWP mounting system to organize wires neatly. Ensure no wires are pinched or damaged during installation. If issues persist, consult the troubleshooting section or contact Honeywell support. Proper wiring is essential for optimal performance and safety. Double-check connections before finalizing the installation to avoid operational problems later.
6.3 Battery and Power-Related Problems
Battery and power issues are common in thermostat installations. Ensure AA batteries are inserted correctly, as improper installation can cause power loss. Low battery warnings may appear if levels drop below optimal thresholds. Replace batteries with high-quality, non-rechargeable AA alkaline cells to maintain consistent power. Avoid mixing old and new batteries, as this can lead to uneven voltage. If the thermostat loses power unexpectedly, check for loose connections or wiring issues. Verify that the UWP is securely mounted and not overtightened, as this can disrupt battery contact. Refer to the installation manual for troubleshooting steps or reset the device by removing and reinserting the batteries. Always use compatible batteries to avoid malfunctions.
6.4 Software or Firmware Issues
Software or firmware issues with the Honeywell TH6320U2008 can occur due to outdated firmware, connectivity problems, or corrupted updates. Symptoms include display malfunctions, unresponsive controls, or loss of smart features. To resolve these, ensure the thermostat has a stable internet connection and restart it by removing the batteries for 30 seconds. If issues persist, perform a factory reset or manually update the firmware through the Honeywell Home app. For severe problems, contact Honeywell Support at 1-855-733-5465 for assistance. Regular firmware updates are essential to maintain optimal performance and security, so always use official channels to download and install updates.
Maintenance and Upkeep
Regular maintenance ensures optimal performance. Clean the thermostat with a soft cloth, update firmware periodically, and replace AA batteries every 12-18 months for reliable operation.
- Clean the display gently to avoid scratches.
- Check for firmware updates to enhance functionality.
- Replace batteries promptly when low battery alerts appear.
7.1 Cleaning the Thermostat
Cleaning the Honeywell TH6320U2008 thermostat is essential for maintaining its performance and extending its lifespan. Turn off the HVAC system and thermostat power before cleaning to avoid damage or electrical issues. Use a soft, dry cloth to gently wipe the display, buttons, and exterior surfaces. For tougher stains or dust buildup, lightly dampen the cloth with water, but ensure no moisture enters the thermostat. Avoid harsh chemicals or abrasive materials that could damage the screen or housing. Regular cleaning prevents dust accumulation, which can interfere with temperature sensing and operation. For detailed cleaning instructions, refer to the Honeywell TH6320U2008 installation manual or contact customer support for assistance.
7.2 Updating Firmware
Regular firmware updates are essential to ensure optimal performance and security for your Honeywell TH6320U2008 thermostat. Updating the firmware enhances system functionality, fixes bugs, and adds new features. To update, first, check if an update is available via the thermostat’s menu or through the Honeywell Home app. Download the latest version from the official Honeywell website or directly through the app. Follow the on-screen instructions to install the update, ensuring the thermostat remains powered on throughout the process. After installation, restart the device to apply changes. Perform firmware updates annually or as prompted by the system to maintain peak performance and compatibility with smart home systems.
7.3 Replacing Batteries
To maintain uninterrupted operation of the Honeywell TH6320U2008 thermostat, replace the AA batteries when the battery indicator appears on the display. Ensure the HVAC system is turned off before starting. Open the battery compartment, located on the back of the thermostat, by sliding it downward. Remove the old batteries and insert two new AA alkaline batteries, aligning the + and ⎼ terminals correctly. Avoid mixing old and new batteries or using different battery types. Close the compartment securely. If issues persist, refer to the installation manual or contact Honeywell support for assistance. Proper battery replacement ensures consistent performance and smart features functionality.
The Honeywell TH6320U2008 installation is complete. Ensure proper functionality by verifying all settings and connections. Contact Honeywell Support for assistance or warranty inquiries if needed.
8.1 Final Checks for Proper Functionality
After completing the installation, perform a thorough check to ensure the Honeywell TH6320U2008 thermostat functions correctly. Turn the system on and off to verify proper operation. Test heating and cooling cycles to confirm the system responds accurately. Check the display for clarity and responsiveness, ensuring all buttons and touch functions work seamlessly. Verify that all wiring connections are secure and not loose. Test smart features like remote access and scheduling to confirm connectivity. Ensure the thermostat is properly mounted and level. Review the installation manual for any additional checks specific to your system. If any issues arise, consult the troubleshooting section or contact Honeywell support for assistance.
8.2 Contacting Honeywell Support
For assistance with the Honeywell TH6320U2008 installation or any related issues, contact Honeywell Support at 1-800-633-3991 (homeowner support) or 1-855-733-5465 (pro-installer support). Support hours are Monday through Friday, 9 AM to 8 PM. Additionally, you can visit the official Honeywell website for detailed installation guides, manuals, and troubleshooting resources. The support team is ready to address any installation or operational concerns, ensuring your thermostat functions optimally. For further assistance, explore the Product Selector tool on Honeywell’s website to find model-specific installation guides and setup instructions. This ensures a smooth and hassle-free experience with your Honeywell TH6320U2008 thermostat.
8.3 Warranty and Service Information
The Honeywell TH6320U2008 thermostat is backed by a limited warranty covering defects in materials and workmanship. The standard warranty period typically lasts for 5 years, though specific terms may vary by region. For service inquiries or warranty claims, homeowners can contact Honeywell Support at 1-800-633-3991, while installers can reach out to 1-855-733-5465. Proper registration of the product is recommended to ensure warranty validity. Additionally, Honeywell provides dedicated customer support and online resources, including manuals and troubleshooting guides, to assist with any issues. Always refer to the official Honeywell website or contact their support team for detailed warranty and service information.