Nostalgia Popcorn Maker Manual: A Comprehensive Guide
Welcome! This manual provides detailed instructions for various Nostalgia models, from classic cart-style to modern hot-air and stirring poppers, ensuring delightful movie nights.
Nostalgia popcorn makers bring the charm of vintage movie theaters directly into your home. Inspired by designs from the 19th century, these appliances offer a unique and fun experience for the whole family. From the iconic cart-style machines reminiscent of classic concessions, to convenient hot-air and stirring models, Nostalgia caters to diverse preferences.
Whether you desire the traditional taste of kettle-cooked popcorn or a healthier, oil-free option, Nostalgia provides a solution. These machines aren’t just about popcorn; they’re about creating memories and enjoying quality time with loved ones. Explore a range of kits and supplies to enhance your popcorn experience, transforming any occasion into a special event!
Understanding Different Nostalgia Models
Nostalgia offers a diverse range of popcorn makers to suit every preference. Cart-style machines, like the professional models making up to 10 or 32 cups, deliver a classic theater experience with a 2.5 or 8oz kettle. For health-conscious users, hot-air models provide an oil-free popping method, creating up to 12 cups.
Alternatively, stirring popcorn makers, available in 8-cup capacities, utilize hot oil for a traditional taste and feature dual-use lids that double as serving bowls. These models boast quick heat technology and cool-touch handles for safe operation, offering convenience and ease of storage.
Cart-Style Popcorn Machines
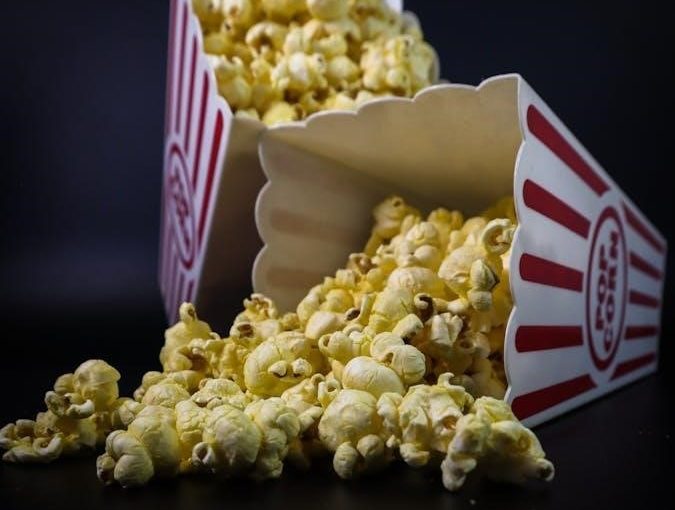
Nostalgia’s cart-style popcorn machines evoke a vintage movie theater ambiance. These models, available in a striking red finish, typically feature a 2.5 or 8oz kettle capable of producing up to 10 or 32 cups of popcorn per batch. The included cart design, often with wheels, enhances portability and adds to the authentic aesthetic.
Essential accessories like a stainless steel scoop and oil spoon are commonly included. These machines are designed for both commercial and home use, offering a professional-quality popcorn experience. Enjoy the fun and flavorful tradition of theater-style popcorn!
Hot-Air Popcorn Makers
Nostalgia hot-air popcorn makers provide a healthier, oil-free popping experience, yielding up to 12 cups per batch. These classic, stand-up cart designs with wheels offer convenience and a nostalgic charm. Utilizing hot air circulation, they efficiently pop kernels without the need for oil, resulting in a lighter snack.
A kernel measuring cup is often included for precise portioning. These models are perfect for family movie nights and health-conscious snacking. Enhance your experience with Nostalgia’s Theater Hot Air Kits and seasoning packs for a complete movie theater flavor!
Stirring Popcorn Makers
Nostalgia stirring popcorn makers deliver theater-style popcorn with hot oil, creating up to 8 cups per batch. Featuring a non-stick surface and quick heat technology, these poppers ensure even cooking and easy cleanup. The dual-use lid conveniently doubles as a serving bowl, simplifying snack time.
Cool-touch handles prioritize safety during operation. Compact designs and easy storage options make these models ideal for any kitchen. Look for models with a 2-quart capacity and PFAS-free ceramic nonstick coatings. A manufacturer’s warranty is available through customer service.

Setting Up Your Nostalgia Popcorn Maker
Preparation is key! Carefully unpack all components, identify each part, and ensure a clean workspace before assembling your Nostalgia popcorn machine.
Unboxing and Component Identification
Carefully open the box and remove all packaging materials. Your Nostalgia Popcorn Maker should include the main unit (cart, base, or popper body), the popping kettle (if applicable), a kernel measuring cup, and potentially an oil spoon.
For cart-style models, verify the presence of wheels, side panels, and any decorative elements. Hot-air models will include the popping chamber and a measuring cup. Stirring models feature a non-stick kettle and dual-use lid/serving bowl.
Compare the contents against the parts list in this manual. If any components are missing or damaged, immediately contact Nostalgia customer service for assistance. Retain the original packaging for potential returns or warranty claims.
Assembling the Cart (if applicable)
If your Nostalgia Popcorn Maker features a cart, begin assembly by attaching the wheels to the base, ensuring they are securely fastened. Next, connect the side panels to the base, using the provided screws or fasteners. Refer to the detailed diagram included in this manual for proper alignment.
Carefully position the popping kettle within the cart frame, ensuring it sits firmly and level. Attach any decorative elements, such as a canopy or signage, following the instructions. Double-check all connections for stability before proceeding.
A properly assembled cart enhances the vintage aesthetic and provides convenient mobility for your popcorn machine.
Initial Cleaning and Preparation
Before first use, thoroughly clean all removable parts of your Nostalgia Popcorn Maker with warm, soapy water. Rinse completely and allow to air dry. Wipe down the exterior surfaces of the machine and cart (if applicable) with a damp cloth.
For kettle-style models, lightly season the popping kettle with a small amount of oil to prevent sticking. This initial seasoning creates a non-stick surface for future use. Ensure all traces of soap are removed to avoid affecting the popcorn’s flavor.
Proper cleaning ensures a hygienic and enjoyable popcorn-making experience.

Operating Instructions: Kettle Style
For classic movie-theater popcorn, add oil and kernels to the kettle, heat, and enjoy! Monitor closely for optimal popping and a delicious treat.
Adding Oil and Kernels
Precise measurement is key! Begin by carefully adding the appropriate amount of popcorn oil to the kettle – typically 2.5 ounces for a standard Nostalgia cart-style machine. Utilize the provided oil spoon for accuracy.
Next, introduce the popcorn kernels. A general guideline is ½ cup of kernels per 2.5 ounces of oil, yielding approximately 10 cups of popped corn. Use the included kernel measuring cup to ensure the correct ratio.
Important: Do not overfill the kettle! Leaving sufficient space allows for proper kernel movement during the popping process, preventing burning and ensuring even cooking. Always refer to your specific model’s instructions for precise measurements.
Heating and Popping Process
Power on and patiently wait! Once the oil and kernels are added, switch on your Nostalgia popcorn maker. The kettle will begin to heat up, and you’ll soon hear the kernels starting to pop.
Maintain constant, yet safe, monitoring. The popping will intensify, and the aroma of fresh popcorn will fill the air. Gently stir the kernels with the provided scoop (if applicable) to promote even heating;
Listen closely! As the popping slows to a few seconds between pops, immediately turn off the machine to prevent burning. Carefully tilt the kettle to dispense the delicious popcorn into your serving bowl.
Safe Operation and Monitoring
Prioritize safety! Never leave your Nostalgia popcorn maker unattended while in operation. The kettle and surrounding areas become extremely hot during the popping process. Always use oven mitts or heat-resistant gloves when handling hot components.
Keep children and pets at a safe distance. Ensure the machine is placed on a stable, heat-resistant surface, away from flammable materials. Avoid overfilling the kettle, as this can cause overflow and potential burns.
Be vigilant! Regularly check for any signs of malfunction and immediately discontinue use if any issues arise.
Operating Instructions: Hot-Air Style
Enjoy healthy, oil-free popcorn! Simply add kernels to the popping chamber, power on, and optimize airflow for consistently popped, delicious results.
Adding Kernels (No Oil Required)
Hot-air popcorn makers operate differently than kettle styles; no oil is needed! This results in a healthier snack. Use the provided measuring cup – or a standard ½ cup measure – to add kernels directly into the popping chamber.
Avoid overfilling, as this can hinder proper airflow and lead to unpopped kernels. Typically, ½ cup of kernels yields a generous batch. Ensure the chamber is clean and free of any debris before adding kernels.
Close the chamber securely, following the model-specific instructions, before powering on the machine. Remember, the beauty of hot-air popping lies in its simplicity and health benefits!
Powering On and Popping
Plug your hot-air popcorn maker into a grounded electrical outlet. Once connected, locate the power switch – usually a simple on/off toggle. Press the switch to initiate the popping process. Kernels will begin to circulate within the popping chamber, heated by the airflow.
Popping typically begins within 2-3 minutes. Avoid obstructing the airflow vents during operation. Position a large bowl or container directly under the chute to catch the freshly popped corn.
Continue popping until the popping slows to a few seconds between pops. Then, immediately turn off the machine to prevent burning.
Optimizing Airflow for Consistent Popping
Consistent airflow is key to evenly popped corn. Ensure the air vents on your Nostalgia hot-air popper are unobstructed by any objects or debris. Do not overfill the popping chamber; kernels need space to circulate freely within the airflow.
Using fresh kernels is also crucial, as older kernels may have lost moisture, impacting popping performance. Avoid adding any oil or butter directly into the popping chamber, as this is designed for oil-free operation.
Experiment with kernel quantity to find the optimal amount for your machine.

Cleaning and Maintenance
Regular cleaning extends your popcorn maker’s life! Wash removable parts with warm, soapy water. Wipe down the exterior and avoid abrasive cleaners for lasting enjoyment.
Cleaning the Kettle/Popping Chamber
Thorough kettle cleaning is crucial for optimal performance and flavor! After each use, and always after the kettle has completely cooled, carefully remove any unpopped kernels. For cart-style models, detach the kettle following the manufacturer’s instructions.
Wash the kettle with warm, soapy water, using a non-abrasive sponge or cloth to avoid scratching the non-stick coating (if applicable). Avoid harsh chemicals or scouring pads. For stubborn residue, a paste of baking soda and water can be effective. Rinse thoroughly and ensure it is completely dry before reassembling or storing.
For stirring popcorn makers, carefully wipe down the popping chamber after cooling. Regular cleaning prevents oil buildup and ensures consistently delicious popcorn.
Washing Removable Parts
Most Nostalgia popcorn makers feature removable parts for easy cleaning! This includes the popping bowl, measuring cup, oil spoon, and any included serving containers. Wash these components in warm, soapy water after each use.
Many parts are dishwasher safe – check your model’s specific instructions to confirm. For handwashing, use a non-abrasive sponge to prevent scratches. Pay close attention to removing all traces of oil and popcorn residue.
Ensure all parts are completely dry before reassembling and storing. Proper cleaning extends the life of your popcorn maker and maintains hygiene for enjoyable snacking!
Storing Your Popcorn Maker
Proper storage is key to maintaining your Nostalgia popcorn maker’s longevity! Before storing, ensure the unit is completely cool and dry. Disconnect the power cord and store it neatly. For cart-style models, consider disassembling for more compact storage if space is limited.
Keep all removable parts clean and dry before storing them with the main unit. Store in a cool, dry place away from direct sunlight and moisture. Avoid stacking heavy items on top of the popcorn maker.
Regularly check the stored unit for any signs of damage or wear.
Troubleshooting Common Issues
Facing problems? This section addresses typical issues like unpopped kernels, burning smells, or a machine that won’t power on, ensuring smooth operation.
Popcorn Not Popping
Problem: If your Nostalgia popcorn maker isn’t popping, first ensure you’re using fresh, dry kernels. Old kernels lose moisture and won’t expand properly. For kettle-style machines, verify sufficient oil is added – too little can cause burning and prevent popping.
Check the heating element: Confirm it’s glowing red during operation. If not, the machine may have an electrical issue. With hot-air models, ensure the vents aren’t blocked, hindering airflow.
Kernel quantity: Avoid overcrowding the kettle or chamber; follow the recommended amount in your manual. A small test batch can help diagnose the issue. If problems persist, contact customer service for assistance.
Burning Smell
Caution: A burning smell from your Nostalgia popcorn maker usually indicates overheating or residue buildup. Immediately unplug the machine and allow it to cool completely. For kettle-style models, excess oil or kernels stuck to the heating element are common causes.
Thorough cleaning is crucial: Carefully remove any unpopped kernels and burnt oil. Ensure the kettle is spotless before reuse. With stirring models, check for food debris around the stirring mechanism.
Ventilation: Ensure adequate ventilation during operation. If the smell persists after cleaning, discontinue use and contact customer support.
Machine Not Turning On
Troubleshooting: If your Nostalgia popcorn maker fails to power on, first verify the power cord is securely plugged into a functioning outlet. Test the outlet with another appliance to confirm it’s receiving power.
Check the power switch: Ensure the switch is in the “On” position. Some models have a reset button – locate and press it if equipped. Inspect the power cord for any visible damage, such as cuts or fraying.
If issues persist: Do not attempt to repair the unit yourself. Contact Nostalgia customer service for assistance and potential warranty claims.
Safety Precautions
Important: Always practice electrical safety, avoid touching hot surfaces, and ensure adult supervision during operation to prevent burns or injuries.
Electrical Safety
Crucially, ensure your outlet voltage matches the popcorn maker’s specifications to prevent damage. Never operate the appliance with a damaged cord or plug; immediate replacement is vital. Avoid using extension cords if possible, but if necessary, select one rated for the appliance’s wattage.
Always unplug the popcorn maker before cleaning or when not in use. Do not immerse the base, cord, or plug in water or any other liquid. Handle the plug with dry hands only. Inspect the power cord regularly for any signs of wear or damage. Never attempt to repair the appliance yourself; contact qualified service personnel for assistance.
Proper grounding is essential for safety. Keep the appliance away from water sources.
Hot Surface Warnings
Caution! The popcorn maker’s surfaces, particularly the kettle, popping chamber, and exterior housing, become extremely hot during operation. Avoid touching these areas to prevent burns. Use oven mitts or pot holders when handling hot components.
Allow the appliance to cool completely before cleaning or storing. Keep children and pets away from the popcorn maker during and immediately after use. Be mindful of the steam released during popping, as it can cause scalding.
Never place flammable materials near the operating appliance. Ensure adequate ventilation to dissipate heat. Exercise extreme care when moving the popcorn maker while it’s still warm.
Supervision During Use
Constant supervision is crucial when operating your Nostalgia popcorn maker. Never leave the machine unattended while it’s heating or popping. This is especially important when children are present. Ensure a responsible adult is always monitoring the process.
Be attentive to any unusual smells or sounds, which could indicate a problem. Immediately unplug the appliance if you notice anything concerning. Do not attempt to repair the unit yourself; contact customer service for assistance.
Regularly check the popping process to prevent burning or overheating. Maintain a safe distance while the machine is in operation.
Accessories and Kits
Enhance your experience with Nostalgia’s kernel measuring cups, oil spoons, and seasoning packs! Complete kits deliver a true theater-style popcorn experience.
Kernel Measuring Cups
Accurate measurements are crucial for perfect popcorn! Nostalgia popcorn makers often include a dedicated kernel measuring cup, ensuring you use the optimal amount for your machine’s capacity. Using the correct quantity prevents unpopped kernels or burning.
Refer to your model’s instructions for the recommended cup measurements – typically, one cup yields around 8-10 cups of popped popcorn. Avoid using standard kitchen measuring cups, as they may differ in volume. Consistent use of the provided cup guarantees consistently delicious results every time you enjoy a movie night or snack.
For best results, level off the kernels in the cup before adding them to the popcorn maker.
Oil Spoons
Precise oil measurement is vital when using kettle-style Nostalgia popcorn makers. Many models include a specialized oil spoon designed to dispense the correct amount of oil for each batch. Using the provided spoon ensures optimal flavor and prevents a greasy or dry result.
Typically, the oil spoon is calibrated to deliver the appropriate oil-to-kernel ratio. Refer to your machine’s instructions for specific measurements. Avoid substituting with standard kitchen spoons, as their capacity may vary. Consistent oil measurement contributes to perfectly popped, flavorful popcorn every time.
Always use caution when handling hot oil.
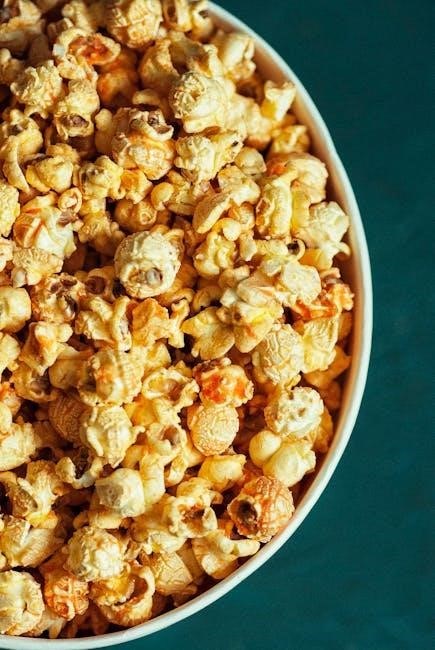
Seasoning Packs and Theater Kits
Enhance your movie night with Nostalgia’s seasoning packs and theater kits! These kits are designed to replicate the authentic movie theater popcorn experience at home. They often include flavored salts, butter-flavored toppings, and even classic popcorn containers for a truly immersive feel.
Nostalgia offers a variety of seasoning options, from classic butter and cheese to more adventurous flavors. Theater kits frequently complement both hot-air and kettle-style machines. They provide a convenient way to add that finishing touch to your freshly popped popcorn, creating a delightful treat for all.
Warranty Information
Nostalgia provides a manufacturer’s warranty for its popcorn makers; contact customer service to request details or initiate a claim for covered issues.
Registering Your Product
Product registration is highly recommended to ensure efficient warranty service and to receive important updates regarding your Nostalgia popcorn maker. Registering allows us to quickly process any potential claims and provide timely assistance.
Visit our official website – details are often included on a separate card within the packaging – and locate the product registration section. You will typically need your model number, date of purchase, and proof of purchase (receipt) to complete the process.
Registration also enables you to receive exclusive offers, new product announcements, and helpful tips for maintaining your popcorn maker. Don’t delay – register today for peace of mind!
Contacting Customer Service
Need assistance? Our dedicated customer service team is here to help with any questions or concerns regarding your Nostalgia popcorn maker. We strive to provide prompt and efficient support to ensure your complete satisfaction.
You can reach us through several convenient channels: visit our website for a comprehensive FAQ section and online contact form, or call our toll-free number – details are available in this manual and on our website.
For warranty claims, please have your proof of purchase and model number readily available. We are committed to resolving your issues quickly and effectively!
Warranty Coverage Details
Your Nostalgia popcorn maker is warranted against defects in materials and workmanship for a period of one year from the date of original purchase. This warranty covers normal household use and does not include damage resulting from misuse, abuse, accidents, or unauthorized modifications.
To make a warranty claim, you must provide proof of purchase and a detailed description of the defect. We will, at our discretion, repair or replace the defective product.
This warranty gives you specific legal rights, and you may have other rights which vary by state.